
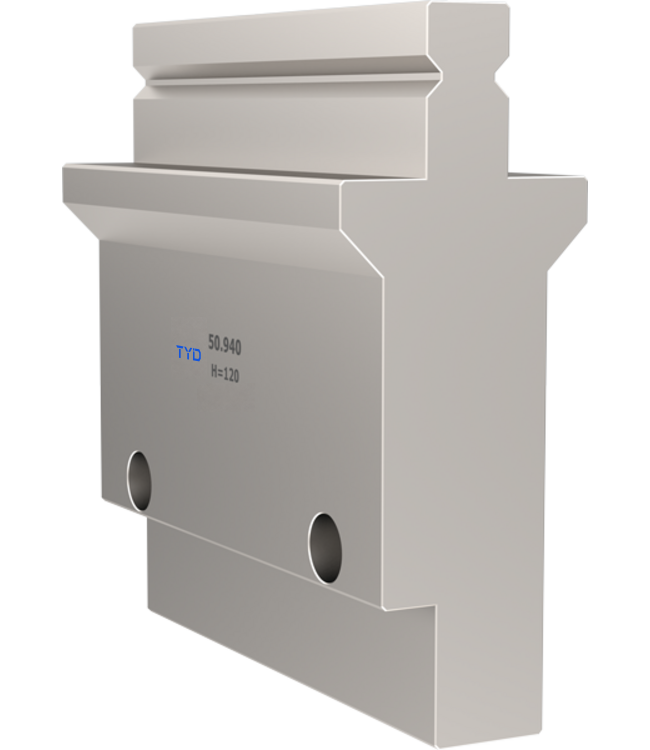
Press brake tooling compatibility depends on the clamping interface, seating dimensions, working height and rated load—not the machine brand alone. Check the upper punch and lower die separately. If an adapter is required, review the complete tool stack before ordering.
This checklist answers whether a tool can mount and operate correctly on your machine. The next step is to check whether its forming geometry suits your part.
Separate machine fit from application fit
| Check | What it answers | Evidence |
|---|---|---|
| Interface fit | Can the tool seat, clamp and be retained correctly? | Clamp and holder drawings, tang dimensions and clear photos |
| Working envelope | Can the machine accommodate the assembled height and travel? | Punch, die and adapter heights; machine stroke and daylight |
| Load fit | Can every component carry the intended loading? | Machine, clamp, holder, adapter and tool ratings |
| Application fit | Can the setup form the required geometry and finish? | Part drawing, material, bend method and trial bend |
The pre-order compatibility checklist
- Identify the exact machine. Record the manufacturer, model, bed length, nominal force, crowning arrangement and any changed clamping equipment. The clamp fitted today is the relevant reference.
- Document the upper interface. Record the punch tang or shank dimensions, seating surfaces, orientation and retention features required by the clamp. Include a scale in photographs, and supply a dimensioned drawing where possible.
- Document the lower interface. Check the die base, rail or holder geometry, centering arrangement and required seating width. A matching upper interface does not establish a matching lower interface.
- Check working height and movement. Add punch, die, holder and adapter heights. Review installation access, opening for loading, ram travel, backgauge access and the path needed to remove the finished part.
- Confirm the section plan. Specify the total installed working length and the individual segment lengths. Check end clearance for boxes and returns, and confirm replacement segments belong to a compatible set.
- Review the load path. Compare permitted force, units, effective loading length and local-load restrictions for the machine and every component. A short tool must not be assumed to accept the machine’s total nominal tonnage.
- Check the job. Confirm material grade and thickness, bend length, angle, inside radius, minimum flange, forming method and acceptable surface marking.
Why a brand name does not prove interchangeability
A machine family may use more than one generation of clamp. Terms such as European-style, Amada-style or Trumpf/WILA-style are useful search labels, but they are not a dimensional approval. Compare the actual mounting surfaces and retention requirements. Never force a tool into a clamp because its catalogue photograph looks similar.
Native tooling or an adapter?
Native tooling is a straightforward option when the installed interface is known and suitable profiles are available. An engineered adapter can be useful when a required tool belongs to another interface family, but it changes the assembled height and load path.
- Obtain drawings for both sides of the adapter and the intended direction of conversion.
- Check clamp engagement, tool retention and seating with the complete assembly.
- Check available machine travel and clearance after adding the adapter.
- Use the adapter’s specified load limits and installation instructions; do not improvise spacers or a conversion.
What to send for a compatibility review
- Exact machine model and photographs of the installed upper clamp and lower holder
- Existing tool or holder drawings, with interface dimensions
- Candidate tool identification and required segment list
- Part drawing, material grade, thickness and bend length
- Required angle, inside radius, surface condition and forming method
- Details of adapters already used in the stack
Frequently asked questions
Are Amada and Trumpf tools interchangeable?
Do not assume they are. Confirm the exact interface family and dimensions. Cross-system use requires an explicitly compatible configuration or a validated adapter.
Does a tool that clamps correctly pass every compatibility check?
No. You must also check retention, working height, motion clearance, load limits and the forming requirements of the part.
Can I extend an existing segmented set?
Only after comparing mounting geometry, profile, working height, tolerances and the manufacturer’s compatibility requirements. Check the assembled joints and a representative bend.
What if the interface cannot be identified?
Send clear clamp and holder photographs plus existing tool dimensions. Keep the order on hold until the interface and load path are resolved.
Plan your tooling request
Start with the actual clamp and holder, then select the punch profile and die geometry around the part. Browse Tranyond press brake tooling or contact Tranyond with your drawing and machine details.